Amana & Speed Queen
NOTE: Chapter 2 covers problems common to almost all Amana and Speed Queen dryer designs, like heating problems.
THIS chapter covers only diagnosis and repairs peculiar to Amana-built dryers.
If you do not read Chapter 2 thoroughly before you read this chapter, you probably will not be able to properly diagnose your Amana or Speed Queen machine!!!
Figure SQ-1 shows the general layout of these dryers.
The drum is supported at the front by two small glides beneath the drum. The rear of the drum is supported by rollers.
The cabinet is solid on three sides, so everything is accessed through the front of the machine.
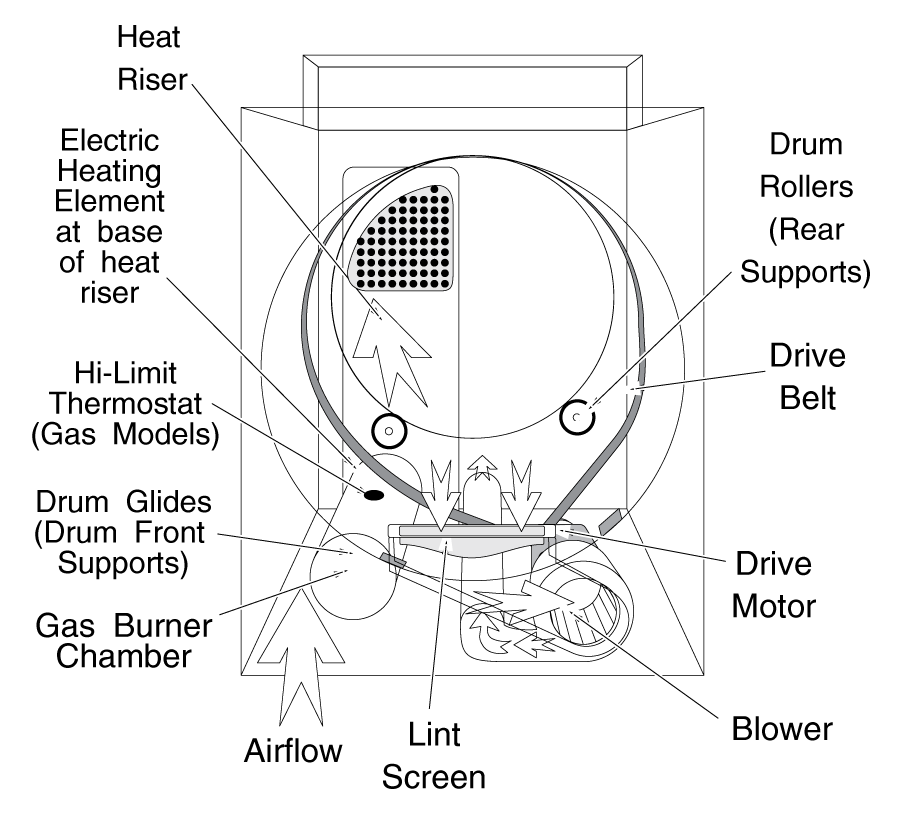
The blower fan is mounted directly to the front of the drive motor. The drive pulley and belt come off the rear of the motor, and the belt goes completely around the drum. The motor and blower are on the right side of the baseplate of the machine. A spring-loaded idler, mounted to the motor baseplate, keeps tension on the belt.
In gas models the burner is on the left side of the baseplate of the machine. It is accessible through the small inspection door on the lower left front of the machine. In electric models, the heater is located at the bottom of the heat riser duct, at the left rear of the machine.
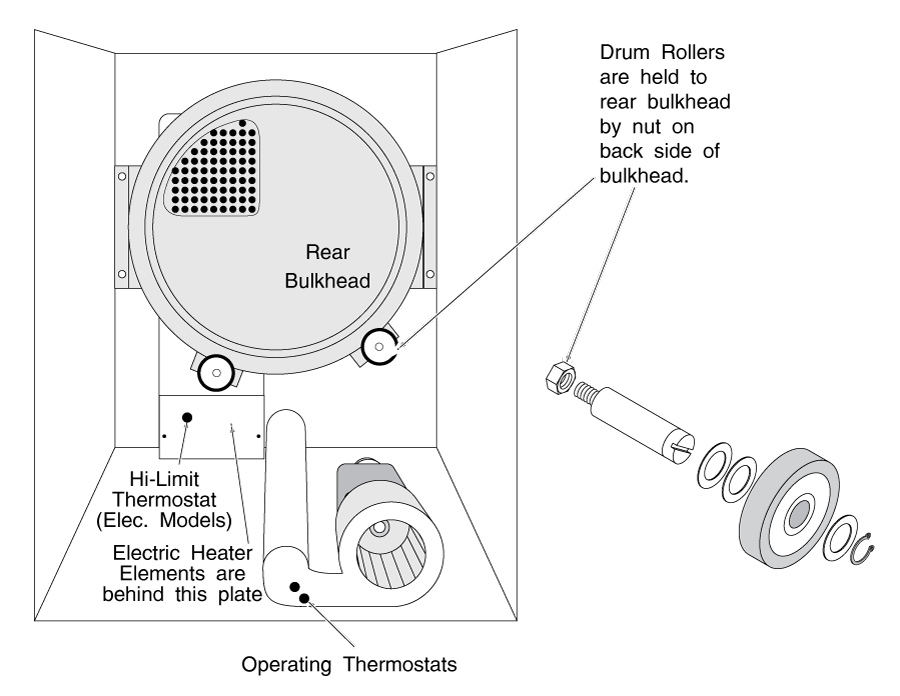
Operating thermostats in these machines are located on the front of the blower exhaust housing. Hi-limit stats are located on top of the burner chamber in gas models, and directly on the heater panel in electric models.
The most common problems in these machines are as follows:
1) Rumbling or banging noise, getting progressively worse over time, or squeaky sounds coming from the drum support rollers. Replace the rollers as described in section 6-4.
2) Heating problems. Diagnose and repair as described in chapter 2.
3) Drum doesn't turn, caused by a broken belt. Replace as described in section 6-4.
4) No airflow, caused by the blower being clogged with lint. Remove the front panel and repair as described in section 6-3.
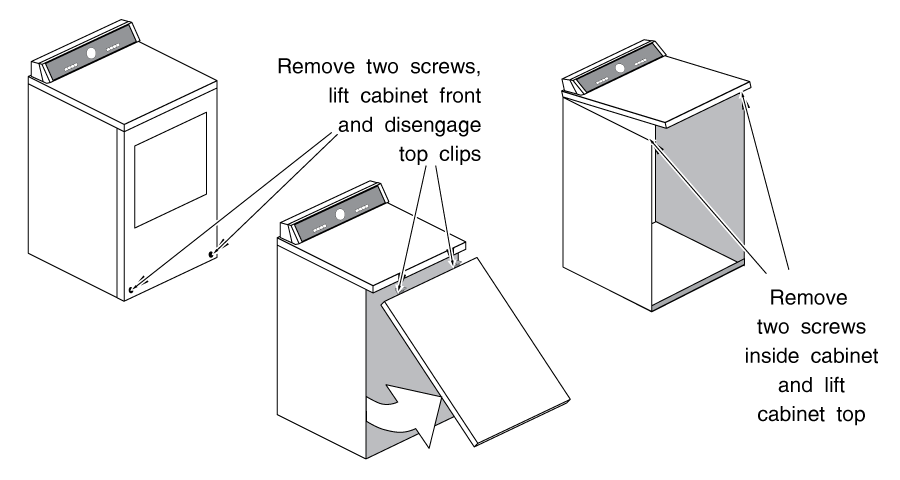
Remove the two screws at the bottom of the cabinet front. Lift the bottom of the front panel until the clips at the top of the panel disengage from the top. Be careful to note the position of any door switch or other wiring and disconnect it as you remove the panel.
If you wish to lift the cabinet top, remove the two screws beneath the front corners.
BLOWER
To inspect, clean or replace the blower wheel, remove the blower inlet cover. The blower is threaded onto the motor shaft with a regular right-hand thread.
To inspect and/or replace drum glides, belt or electric heater elements, you must remove the drum as follows:
1) Remove the cabinet front and the blower inlet duct as described in section 6-3.
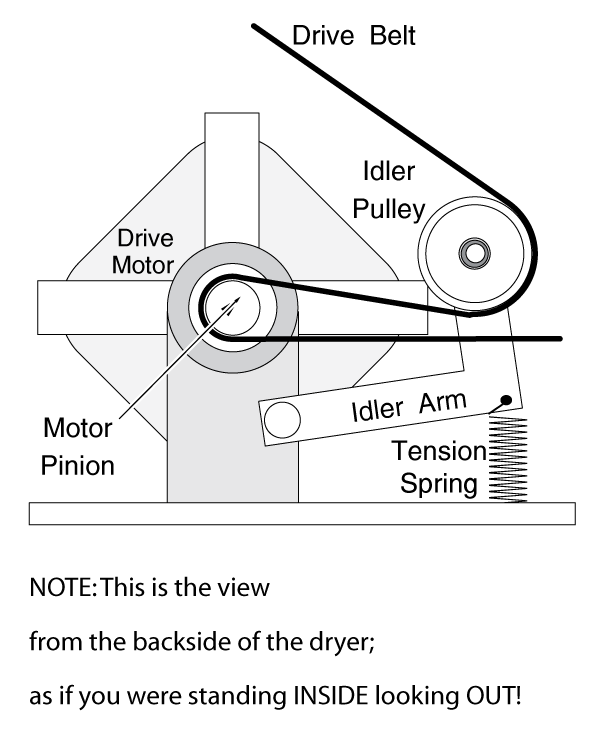
2) Reach back and disengage the drive belt from the idler. (Figure SQ-3)
3) Remove the four screws from the front bulkhead as shown in figure SQ-4. Note that the bottom front corners of the bulkhead are supported by slots in the cabinet sides; this will help you support and align the bulkhead when assembling or disassembling. While holding the drum in place, lift out the bulkhead and set it aside. Then lift out the drum.
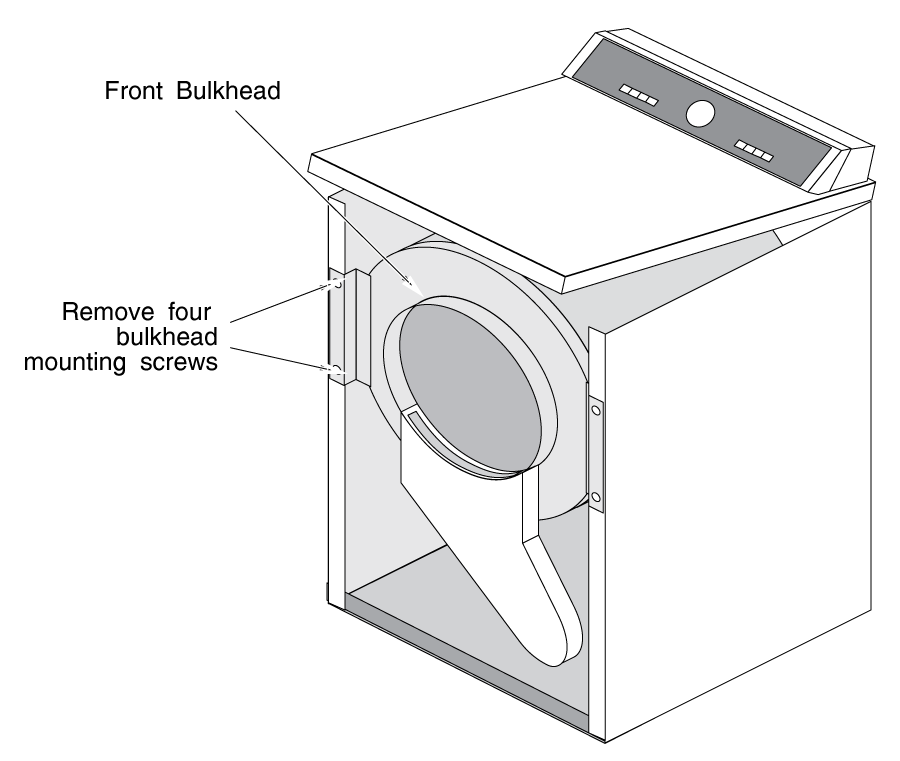
The drum glides are on the lower front corners of the inside of the bulkhead. Whether they're worn badly or not, replace them. They're cheap insurance against future problems.
The belt can be easily changed at this time. Don't forget to check the idler pulley for free movement.
The drum support roller shafts are held to the rear bulkhead by a nut. They have screwdriver slots cut into the top of the shaft for easy removal and replacement. (Figure SQ-5)
The front and rear felt drum seals can also be inspected for wear at this point. If you need to replace them, they are held on by a spring-loaded metal strap beneath them. Note that the outer edge of the front seal tucks beneath the lip on the front bulkhead. When re-assembling the dryer, make sure these felt seals are not pinched or wrinkled.
In electric clothes dryer models, the heater element is located inside the metal plate at the bottom of the heat riser at the left rear of the machine. Test it for continuity as described in Chapter 2 and replace if defective.
Please share our .