Maytag Performa Models including Norge, Magic Chef, and Admiral
NOTE: Chapter 2 covers problems common to almost all Maytag Performa dryer designs, like heating problems.
THIS chapter covers only diagnosis and repairs peculiar to Maycor-designed dryers.
If you do not read Chapter 2 thoroughly before you read this chapter, you probably will not be able to properly diagnose your machine!!
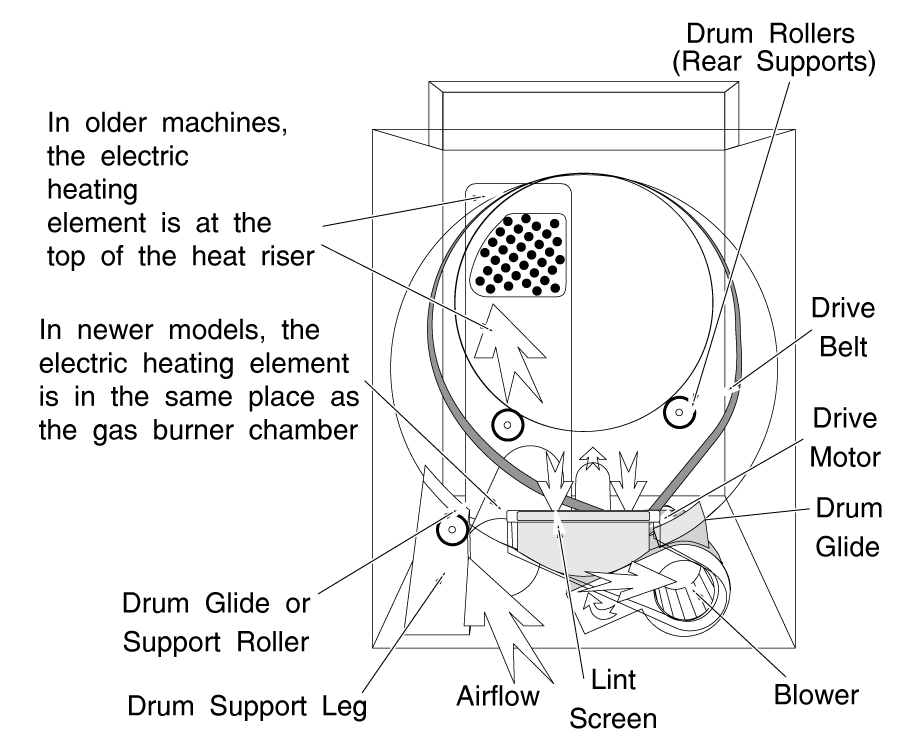
Figure NN-1 shows the general layout of these machines.
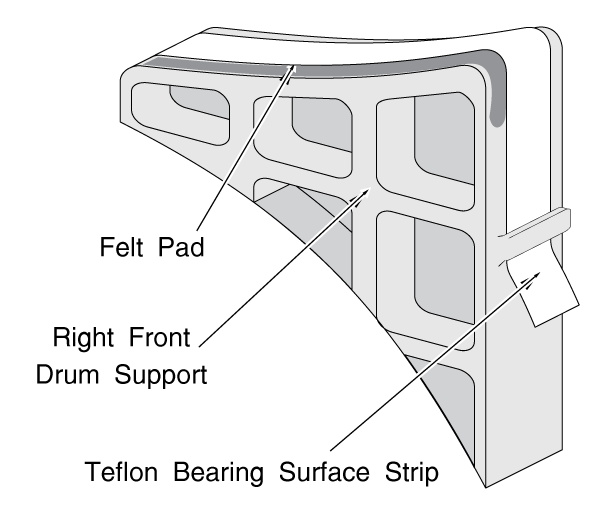
The rear of the drum is supported by two rollers. At the front, the drum is supported on the left side by a glide or roller mounted to a steel leg, which is welded to the baseplate. The front right side of the drum is supported by a glide which is molded into the blower housing.
The cabinet is solid on three sides, so everything is accessed through the front of the machine.
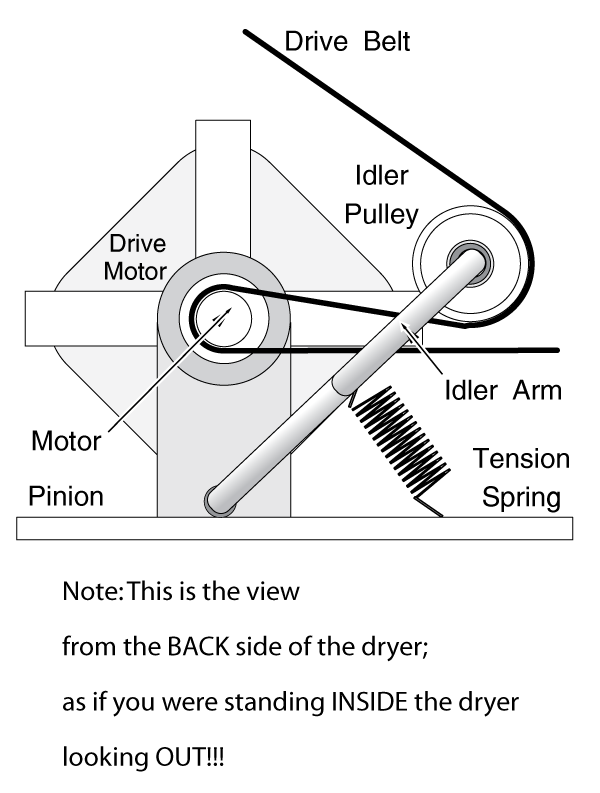
The blower fan is mounted directly to the front of the drive motor. The drive pulley and belt come off the rear of the motor, and the belt goes completely around the drum. The motor and blower are on the right side of the baseplate of the machine. A spring-loaded idler keeps tension on the belt.
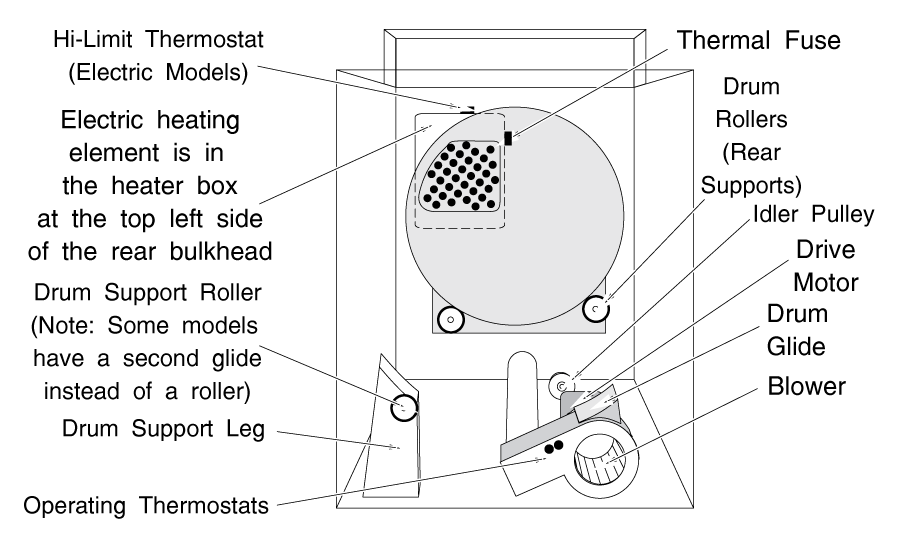
In gas models the burner is on the left side of the baseplate of the machine. It is accessible through the small inspection door on the lower left front of the machine. In electric models, the heater is located at the top of the heat riser duct, at the left rear of the machine.
Operating thermostats in these machines are located on the front of the blower exhaust housing. Hi-limit stats are located on top of the heat riser duct.
The most common problems in these machines are as follows:
1) Loud rumbling or banging noise, getting progressively worse over time, or squeaky sounds coming from the drum support rollers. Also, scrubbing sounds (metal-to-metal) coming from worn drum glides. Remove the drum and replace the rollers or glides as described in section 5a-3.
2) Heating problems. Diagnose and repair as described in chapter 2.
3) Drum doesn't turn, caused by a broken belt. You do not need to remove the drum to replace the belt in these machines. Replace as described in section 5a-3.
4) No airflow, caused by the blower being clogged with lint. Remove the front panel and repair as described in section 5a-3.
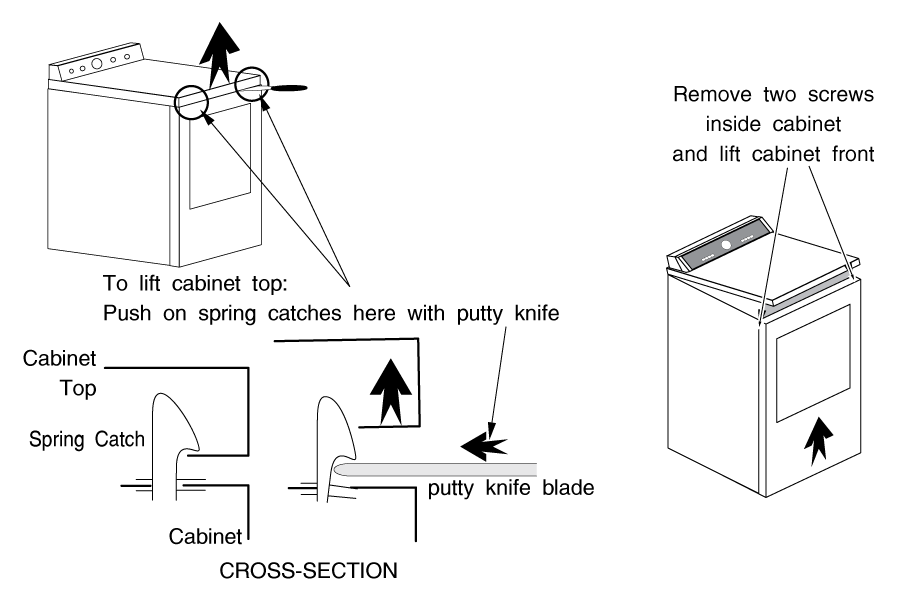
Lift the cabinet top by pushing on the spring clips as shown in figure NN-2.
Newer machines may also have the newer-style cabinet. See figure ML-2 in Chapter 5 for access.
With the top lifted, in some older models you have access to the electric heater element, located at the top left rear of the machine. In newer models it is located beneath the drum on the left side. Test as described in Chapter 2.
Remove the two screws inside the top of the cabinet front. Lift the front panel until the clips at the bottom of the panel disengage. Be careful to note the position of any door switch or other wiring and disconnect it as you remove the panel.
With the front panel of the machine off, you can inspect or replace the belt. Reach between the blower housing and the drum and release tension, (figure NN-3) then lift the front end of the drum slightly to slip the belt between it and the front drum support. When installing the belt, make sure you get it into its groove in the drum.
BLOWER
To inspect, clean or replace the blower wheel, remove the blower inlet cover. The blower is held onto the motor shaft with a spring clip.
DRUM REMOVAL
With the cabinet top raised, the cabinet front removed and belt tension released, the drum just lifts out.
The drum support rollers are held to their shafts by a spring clip. (Figure NN-4) Check for free movement and wear and replace if bad.
The teflon friction surface of the drum support glide(s) can be easily removed and replaced. (Figure NN-5) Simply slip one end out of the slot and then slip the notched end off the pins that hold it in place.
The front and rear felt drum seals can also be inspected for wear at this point. They are glued in place. If you need to replace them, scrape them off and glue new ones on. When re-assembling the dryer, make sure these felt seals are not pinched or wrinkled.
Please share our .